
Introduction
In this blog post, I will address a common, but often overlooked issue in many organizations today which is managing orphaned service principals (those without assigned owners) and handling situations where the secrets and certificates of any service principal are either about to expire or have already expired.
Additionally, I will cover how to warn both the service principal’s owner (if one is assigned) and the relevant IT, governance or IAM teams that will receive the categorized lists of these objects based on your choices.
This post marks the beginning of a new category of posts for me. The concept behind this new category is to create a functional solution that can be deployed in any Azure tenant by simply running the Terraform code. This process will automatically result in the necessary resources and provide a fully operational solution to a specific problem while ensuring a focus on least privileges.
One aspect you might consider customizing is the random Microsoft-generated domain we use for sending notifications. Each domain is randomly generated by Microsoft and is unique for your solution.
Prerequisites
The prerequisites to enable this solution are fairly limited as you primarily need permissions to deploy the solution and create a service principal for handling lookups in Entra ID.
The requirements for implemeting this solution are listed below.
User running Terraform – these permissions are only required during deployment or updates:
- Create new service principal
- Create new resource group
- Set permission on resource group and resources inside the resource group
- Add secret to key vault (e.g. key vault secrets officer)
Service principal created using Terraform:
- API permissions (someone needs to approve these AFTER Terraform has run)
- Microsoft Graph
- Application.Read.All (Microsoft docs)
- This is used to get the required information about when a secret or certificate is expiring and who the owner of the service principal is
- Organization.Read.All (Microsoft docs)
- User.Read.All (Microsoft docs)
- This is required to find information about the service principal owner
- Application.Read.All (Microsoft docs)
- Microsoft Graph
Terraform
The client executing the code must have Terraform installed. Terraform is free to use and can be installed using the Install Terraform Guide, on the HashiCorp homepage.
Azure CLI
To use Terraform with Azure, you’ll need the Azure CLI. Please refer to Microsoft Learn for installation instructions.
Files
After the Terraform code is deployed, the permissions required by the deploying user are no longer needed and can safely be removed.
Solution
Let’s take a closer look at the solution.
Each step in the process will be described so that you understand exactly what you are deploying. As mentioned earlier, we are using Terraform to deploy the needed infrastructure. All variables are defined in the “variable.tf” file.
Confidential information will be securely stored in a key vault while all other variables will be saved in the automation account’s variable section. However, you only have to focus on the “variable.tf” file. Terraform will save the variables in the respective locations.
Note: We will not use your own domain in the default configuration. The Azure Communication Services will create a custom Microsoft domain. You can change this later by using the GUI or by customizing the Terraform file “communication_service.tf”.
The following is a visualization of what will be deployed.

Step 1 – Triggering the automation account
The automation account will be triggered by the method you choose – either a timer or a manual trigger. Once triggered, it will execute a PowerShell script that uses the managed identity to gain access to both the key vault and the storage account. The script will retrieve the secret for the service principal with Entra ID access from the key vault.
Step 2 – Collecting and sorting data
Once the secret is obtained, the script will connect to the MS Graph module using the service principal. It will gather a list of all service principals, their owners, and whether there are any expiring secrets or certificates associated with them.
Based on the Boolean settings defined in the variable section, the script will perform one or more of the following actions:
- Notify Owners: The script will iterate through all service principals. If it finds any service principals with expiring secrets or certificates and an assigned owner, it will store the owner’s information and the relevant secret details in an array. After processing all service principals, it will send an email to each owner’s stated email address. The timing of these emails is controlled by the
email_inform_owners_days_with_warningsvariable which specifies the number of days before expiry when notifications are sent. - Expired secrets and certificates: The script will identify all service principals with already expired secrets or certificates. This list will be sent to the stated contact email.
- About-to-expire secrets and certificates: The script will compile a list of all service principals with secrets or certificates that are about to expire. This list will also be sent to the stated contact email.
- Orphaned service principals: The script will identify all service principals without defined owners. This list will include a column indicating whether the specific service principal contains any secrets or certificates. The list will be sent to the stated contact email.
Step 3 – Storing the data we need for later
The lists created in the previous step will be saved as CSV files in the storage account. These files will be used in a later stage by the logic app.
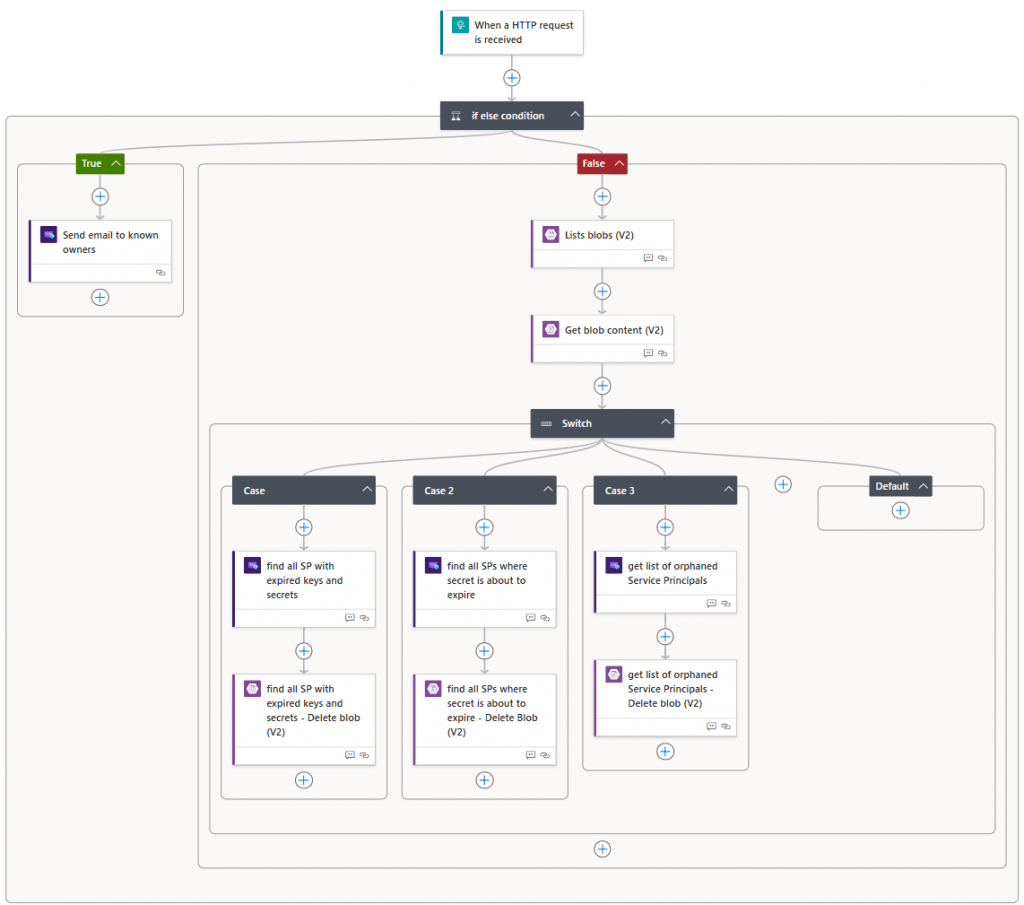
Step 4 – Triggering the logic app
For each of the above tasks, we are going to trigger the workflow in the logic app. The logic app will trigger based on “request type” in the object that are created in the PowerShell script.
Depending on which call is sent, they will be handled differently in the logic app. The managed identity of the logic app will require permissions for the storage account to get the CSV files created in step 2.
Step 5 – Sending the notification
The logic app will forward the message to the Azure Communication Services environment with the emails, CSV files (where applicable) and other information gathered with the PowerShell script.
Variables
Let us take a look at the variables and what they do. Anything written in the “variables.tf” file will be stored as either a variable inside the automation account or as a secret in the key vault.
They are split up in two categories based on whether they require a custom value
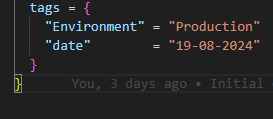
You can set tags that you need in the locals file or just keep it empty.
Requires customisation
email_Contact_email_for_notification_emails
Description:This is the email address that should be used to send a message about all the expiring secrets/certs where an owner could not be found: Note: they will be send as an attachement in CSV format
Type: String
Requires an email address in correct format, there are no checks to verify if this is correct or not
subscription_id
Description: Provide subscription id for deployment
Type: String
tenant_id
Description: Provide tenantid for the specific tenant. This is used during signin
Type: String
baseline_resource_group_name
Description:Resource group where all resources are deployed
Type: String
key_vault_resource_name
Description: Provide name for key-vault, The key vault will be used to store secrets that we don’t wish to store in clear text
Type: String
automation_account_solution_name
Description: This is the name of the automation account. NOTE: This name has to be unique
Type: String
Communication_service_naming_convention
Description: This is a short name, that will be used in front of each of the communication services ressources. Name is used for ressources, so you can use it if you have a naming convetion etc.
Type: String
Service_Principal_name
Description: Service Principal name the application_id value. Used for connecting to Entra ID and collecting secrets and certificates
Type: String
key_vault_secret_key_name
Description: Identity of the secret used for the service principal that have access to see values in entra ID. This name is also used on the SP to identify the key
Type: String
Default values
email_Contact_email_get_list_of_orphaned_Service_Principals
Description: This will send an email to the governance team, with a list of all SP’s that does not have an owner assigned (default: true)
Type: Boolean
Referring to:
email_Contact_email_for_all_SPs_with_expired_secrets_status
Description: Enable this value to notify the governance or IT team about the status of all SP’s with expired secrets or certificates (default: true)”
Type: Boolean
Referring to:
email_Contact_email_for_all_SPs_where_secret_is_about_to_expire
Description: This will send an email to the governance team, with a list of all SP’s where the secret is about to expire (default: true)
Type: Boolean
Referring to:
email_inform_owners_directly
Description:This boolean will define wether or not owners will be contacted directly on expiring or expired secrets and certificates. All owners of the specific SP will be contacted. The owners will be contacted on the days specified in the ’email_inform_owners_days_with_warnings’ variable (default: true)
Type: Boolean
Referring to:
email_inform_owners_days_with_warnings
Description: Define with a string on which days the owner of a SP should receive the notification. eg. 0,1,2 means they will receive the email on the day it expires, 1 day before and 2 days before and so on. (default 1,2,3,4,5,6,7,14,21,28,30)
Type: String
Default: 1,2,3,4,5,6,7,14,21,28,30
secret_cert_days_to_expire
Description: Used in powershell script: the value here defines when a secret will be reported as expiring. (30 days default)
Type: String
Default: 30 days:
logic_app_communication_service_primary_connection_string
Description: Identity of the secret used for the communication service. The name is irrelevant, but for good measure you can still choose on if you wish.
Type: String
Referring to:
location
Description: Define the datacenter where the solution should be deployed
Type: String
Default: sweden central
Deployment
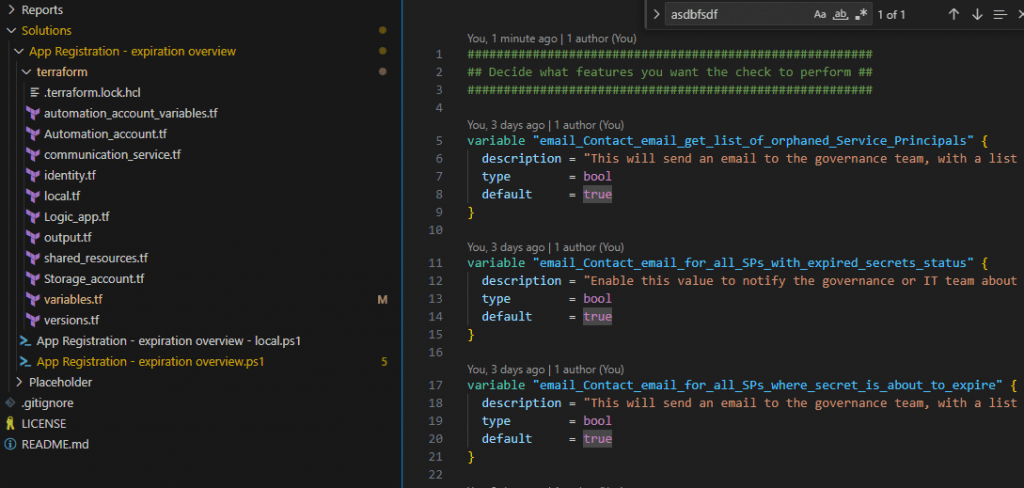
Populate the required variables
Let’s get it deployed. By now you should have downloaded the files from github, and depending on your preferred editor, it should look something like this. The only file that you need to open is the variables.tf.
Ensure that you have populated the fields that are in the “Requires customisation” above and press save.
Create resources by running Terraform
I’m assuming that Terraform is installed, and that it is correctly added to the path attribute (if you are using Windows). Be sure that you CD into the Terraform folder.
|
1 2 |
az login --tenant "6a7d68dc-9a85-46e6-9f4d-1168c4eb6b07" # Where --tenant is your own tenant id |
Run Terraform init to download the required Terraform modules, and run Terraform plan afterwards to check whether everything looks correct.
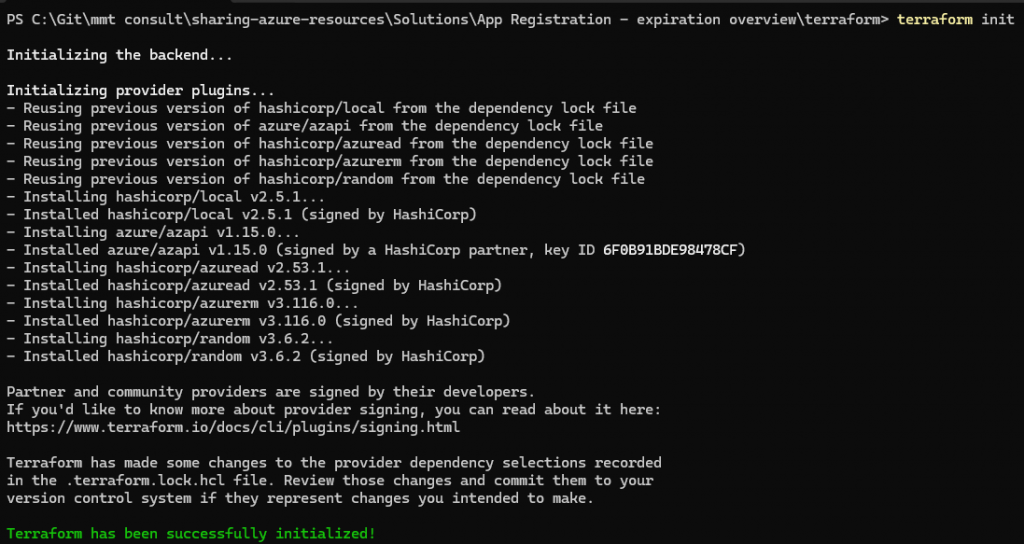
At this step, you will be notified if you do not follow the naming conventions for each resource. Common mistakes include using underscores in resource names where they are not supported. Please note that this process does not check for the uniqueness of names where it is required. This validation will only occur when you run Terraform apply.
It should create 46 new ressources in Version 1.
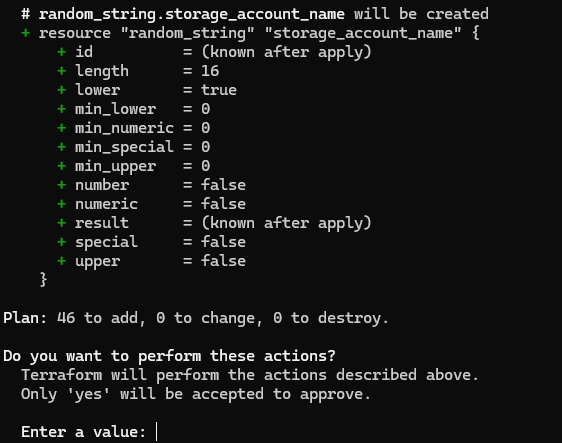
Now, this will run for a few minutes. It should return with a message about everything being created. If not, it is usually because of the resource naming not following the naming convention or the fact that a resource name was not unique.

Now, checking the resource group should show that all resources have been created.
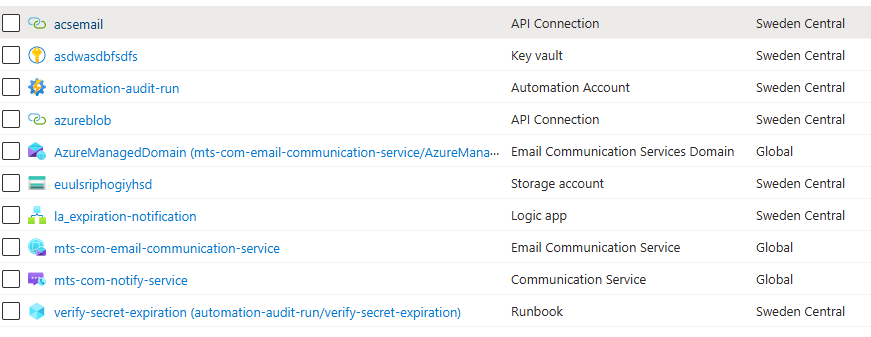
If you do not expect to maintain this using Terraform, you can delete the state file and Terraform files from your local drive. The rest can be handled from the portal.
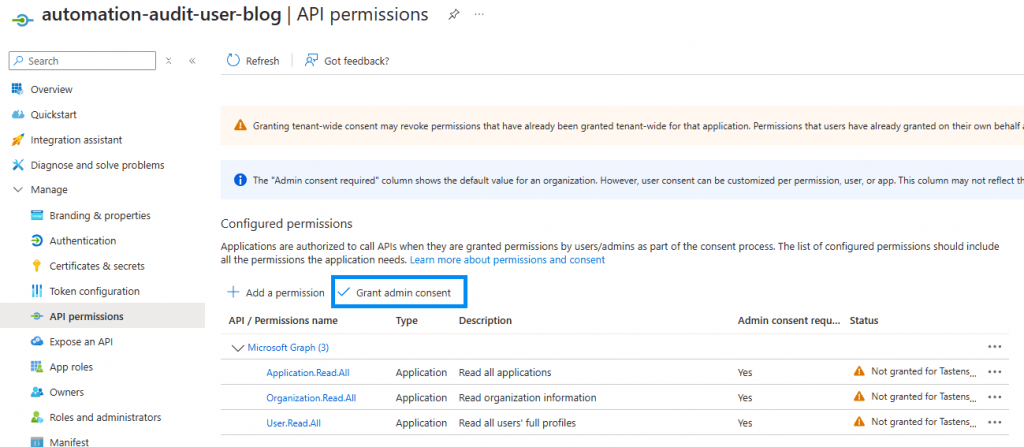
Provide permissions to service principal
The next step is to grant API permissions to the Entra ID service principal. Usually, this step is handled by a specific team, and therefore, I have not automated it. If you have the necessary permissions, you can manually grant the required permissions to the service principal in Entra ID.
Update modules on automation account (requires update 1.1.0)
Due to Azure automation accounts having some default modules installed and the fact that we cannot control these with Terraform unless we import them, the update process will be done by PowerShell.
Run the runbook named “update-az-modules”.

This will let PowerShell update all default modules with the versions as stated in the current az module version.
You can upgrade to higher versions if you prefer. The reason for the versions being as they are here is to ensure that the module versions are tested with this specific use case.
If a module fails, you can run the runbook again which should solve the problem.
Add the custom domain to the allow list (optional)
As part of the script, we have created a custom Microsoft domain with SPF, DKIM, and DMARC enabled. This configuration should help prevent the domain from being flagged as spam. However, depending on your email settings, the domain may still be marked with an “external” tag. This tagging can lead to users being cautious or distrusting of the email which is a valid concern.

Change which part is running
To change which part of the scripts is running, you can change the variables in variables.tf and run Terraform apply again or open the automation account –> Shared Resources –> Variables block and change the value manually.
The script is looking at this location for the information, and the variables.tf basically just updates it here.

Run manually or set up schedule
I have not used Terraform on this part, so in this version you need to open the automation account and either run it or create a schedule in the automation account –> Shared Resources –> Schedules and attach it to the runbook.
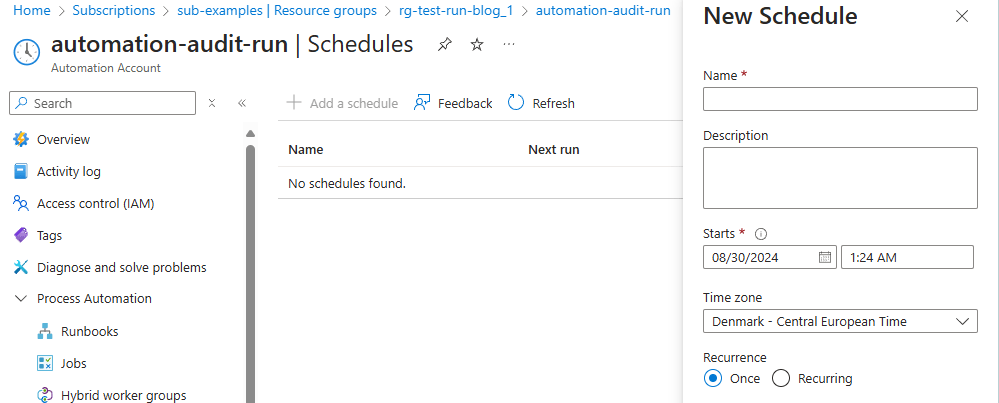
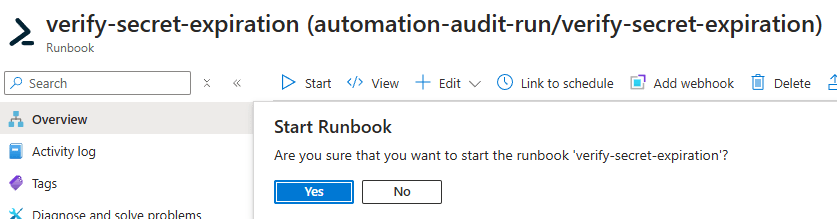
Alternatively, you can run the runbook manually with the start command.
The result
Based on the enabled features, the script will now run through all service principals and sent notifications. Let us run through what each setting does. Each template from below can be edited in the logic app.
email_Contact_email_get_list_of_orphaned_Service_Principals
The defined contact will receive an email like the following.
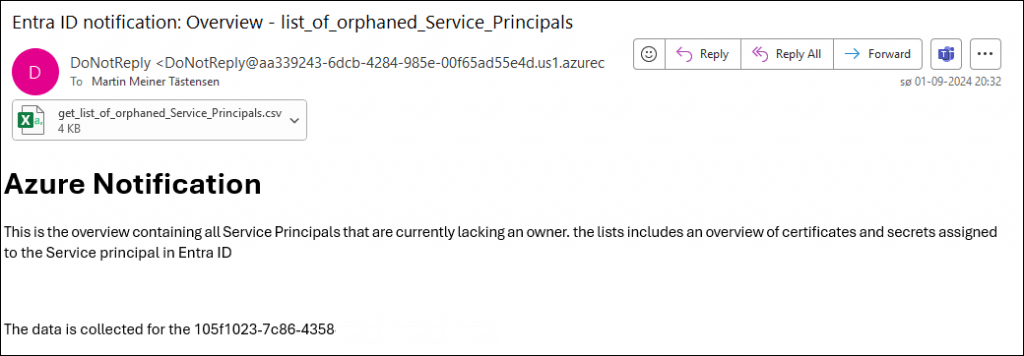
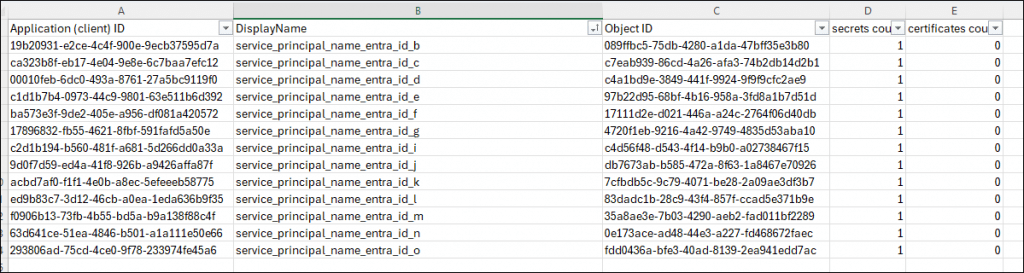
The attachment will show a simple five column overview. In this case, you should get an idea about how many times I have deployed this solution in my test tenant.
email_Contact_email_for_all_SPs_with_expired_secrets_status
Same template as above, but with a new text and subject.
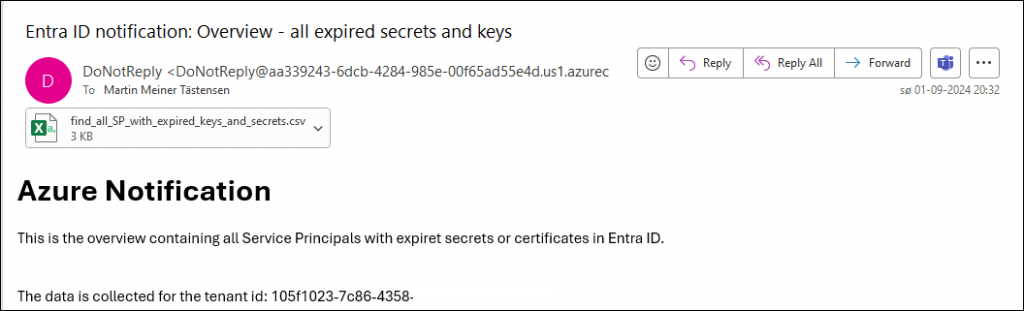
The attachment contains both the orphaned service principals as well as the ones with a defined owner.

email_Contact_email_for_all_SPs_where_secret_is_about_to_expire
The last list is a list with all secrets and certificates that are about to, but have not yet expired. The list will send items that are both with and without owners

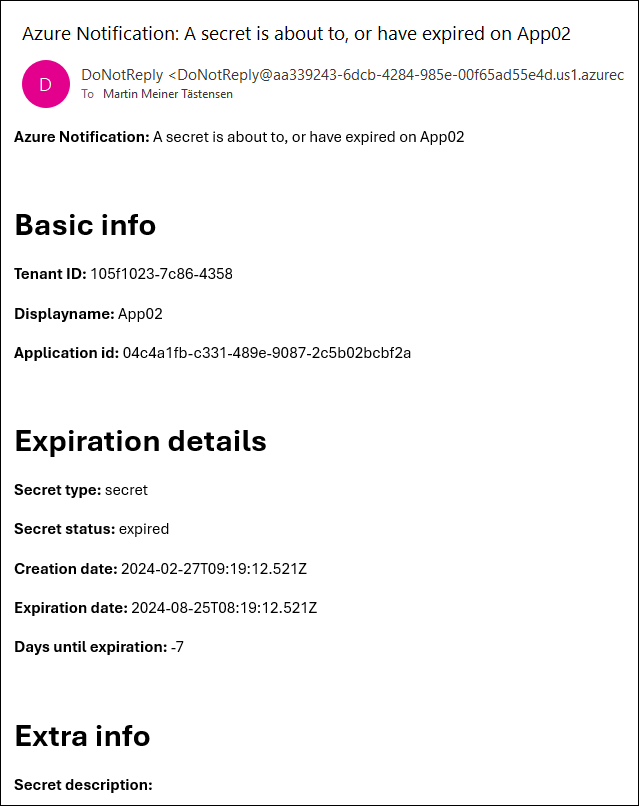
email_inform_owners_directly
An email with the following template will be sent to each owner for each service principal covering every secret or certificate that is about to expire or has already expired.
In this example, it expired seven days ago.


0 Comments